Installing an electric water heater can turn out to be a simpler task than one imagines. Just follow a few guidelines. The electric water heater is a hydraulic device used in many homes. It may happen that, following a breakage of the water heater, or simply because you want a product with a larger capacity, the need to change it and to install a new one arises.

The installation can turn out to be much simpler than you imagine, especially if you usually do some DIY work around the house. In this post, step by step, we will explain how to install an electric water heater.
Index:
- Preliminary operations
- Choosing hoses for the water heater
- Preparing the hoses
- Non-return valve
- Final operations
Preliminary operations
The advice we give you is to turn off the water valve so that you do not risk getting wet during the installation process.
The first operation to be carried out is to fix the bracket which will hold the heater to the wall. Using a drill, we drill two holes in the wall and screw the bracket in using two Fischer screws which are usually included in the package
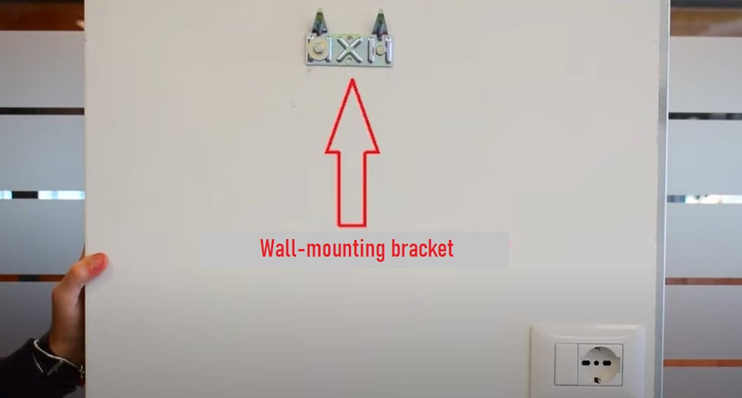
In the example, we have used a 10-litre water heater for pure convenience. The installation procedure, however, is also the same for larger water heaters, such as 80 or 100 litre models. Only the bracket will change, which in the larger capacity models is located on the body of the water heater, which must be fixed to the wall with simple L-shaped fixings.
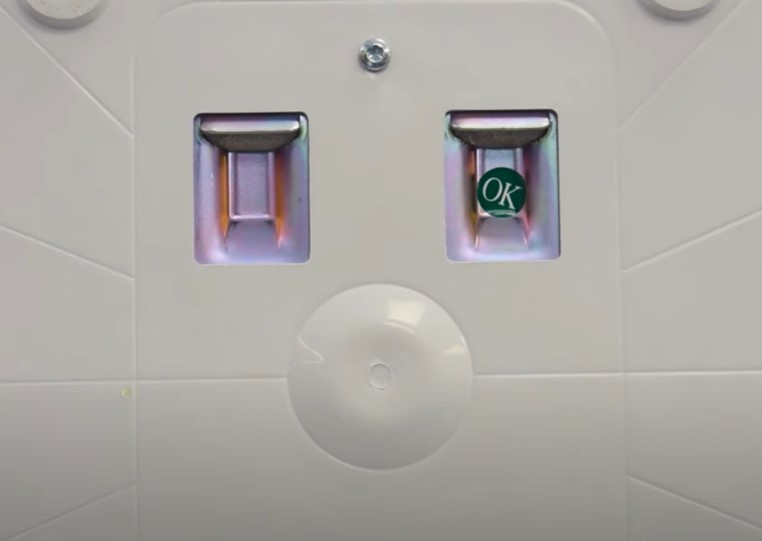
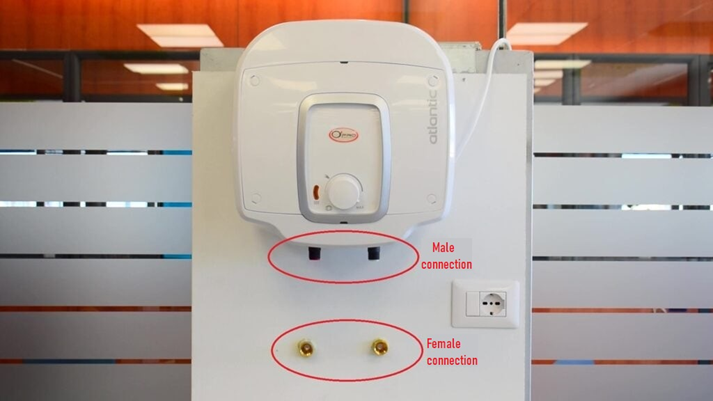
On the back of the heater are the two housings that will accommodate the bracket installed on the wall, resting on it and supporting the weight of the heater. We suggest you to purchase a convenient Universal water heater mounting kit compatible with any brand and consisting of 2 hoses, 1 Teflon tape and 4 gaskets.
At this point, we can connect the heater to the bracket, and proceed to the next steps of anchoring the hot and cold water connection hoses.
Choosing hoses for the water heater
The second step in the installation process of an electric heater involves the choice of hoses. The hoses can have either a male or a female connection.
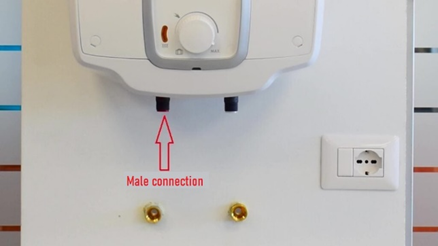
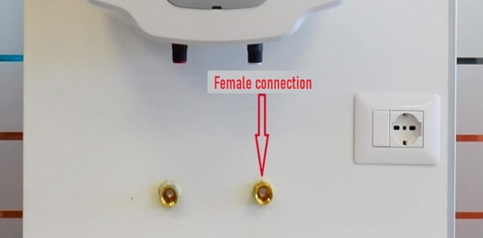
The male connection has an external thread. The female connection has the internal thread, and accommodates the male to be screwed in. Pipes coming from the heater are both male. Those coming from the pipes underneath the walls can have both male and female connections.
In our case, both are female. Strictly speaking, therefore, we will have to use two hoses with the male connection on one side and the female connection on the other.
When choosing pipes, we should also take into account the size, which we will read on the data sheet, so as not to make mistakes.
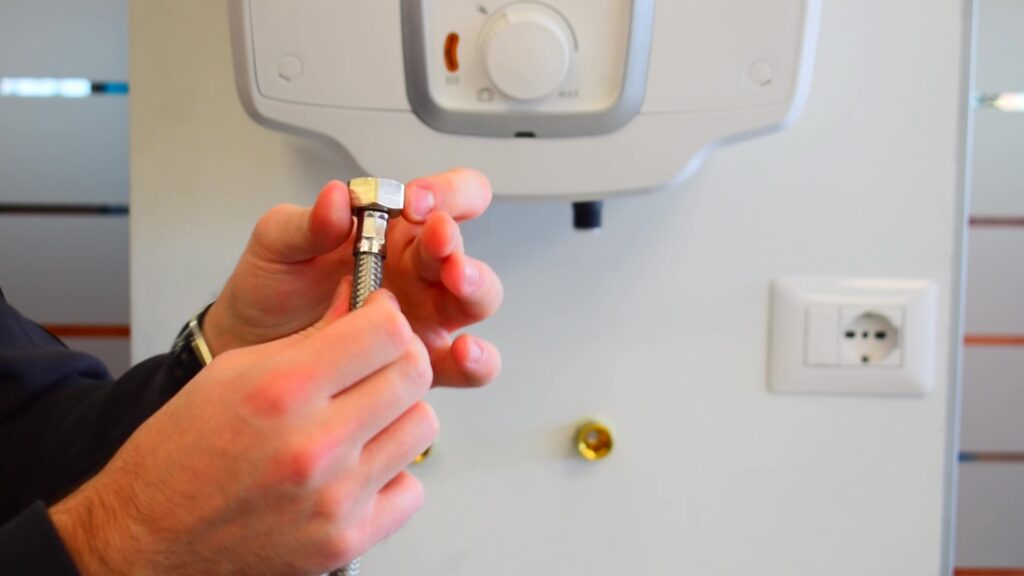
To screw the hoses tightly to the pipes on one side, and to the heater on the other, we used Teflon tape, but you can also use hemp with sealing paste.
Preparing the hoses
We first apply Teflon tape on the male hose connection, in the opposite direction to where it will be screwed in.
We take just the right amount, so as not to create too much thickness. If, therefore, the hose is screwed in a clockwise direction, the tape should be applied anticlockwise.
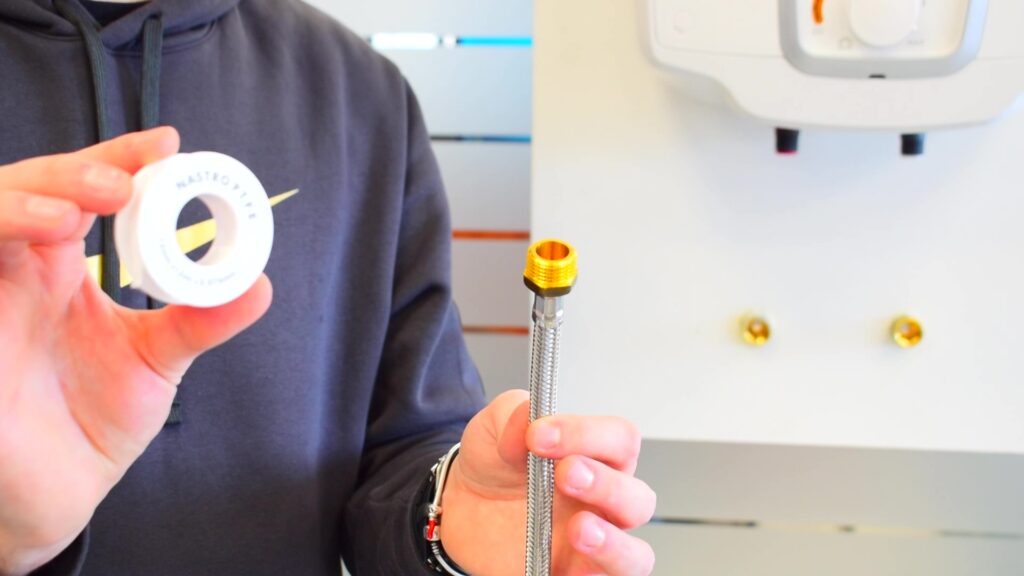
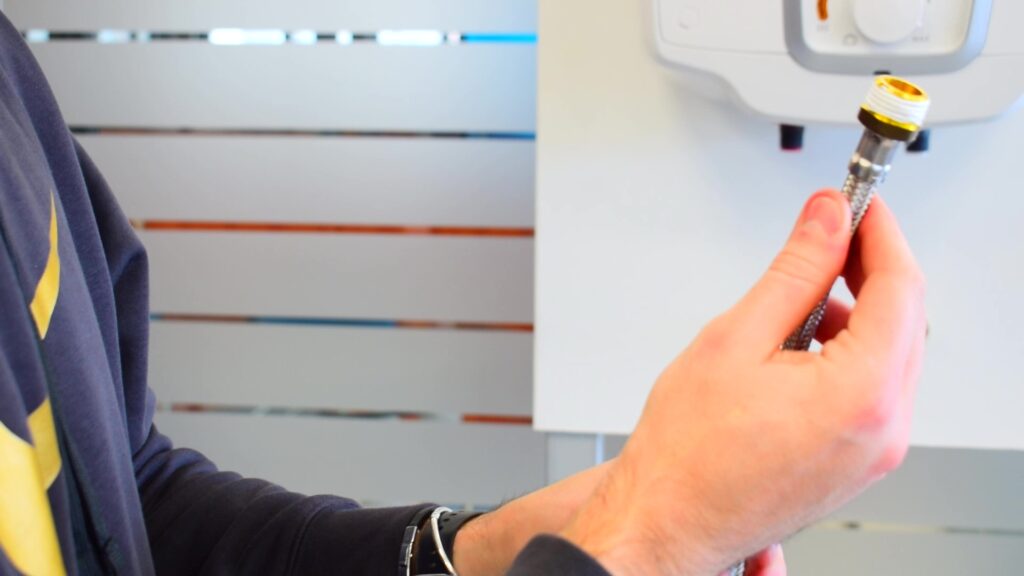
We repeat the same procedure for the other hose, and then we also apply Teflon to the male connections of the electric water heater, as you can see in the following photo:

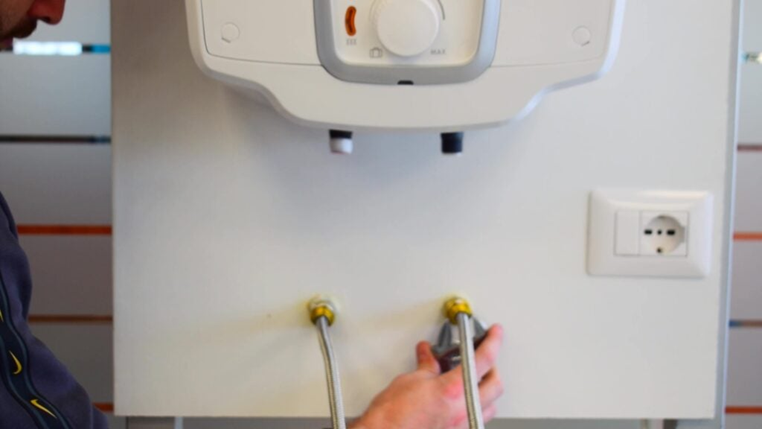
The male side of the hoses is stationary, while the female side rotates. Logically, therefore, we first screw the male connection of the hose to the female connection coming out of the wall.

Now we can screw both hoses from their male connection side to the female connection of the hoses coming from the wall.
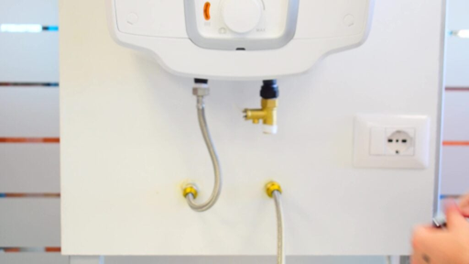
Non-return valve
The last operation is to screw the hoses to the water heater. And if on the hot water side we can do this directly, on the cold water side we have to add a non-return valve. This valve keeps the water from flowing back from the heater to the pipe, and also acts as a vent.
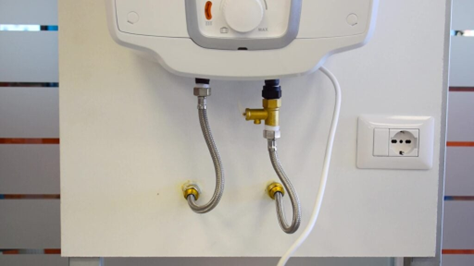
Final operations
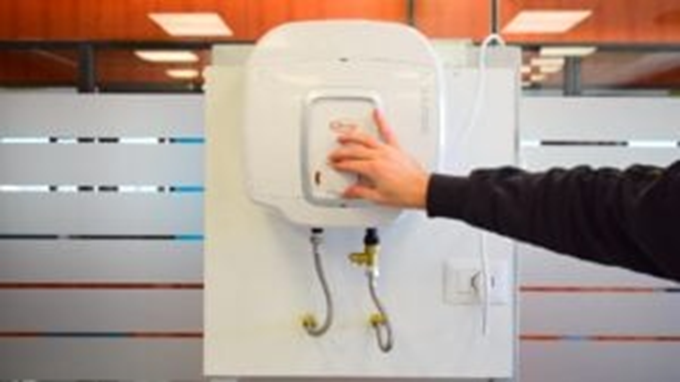
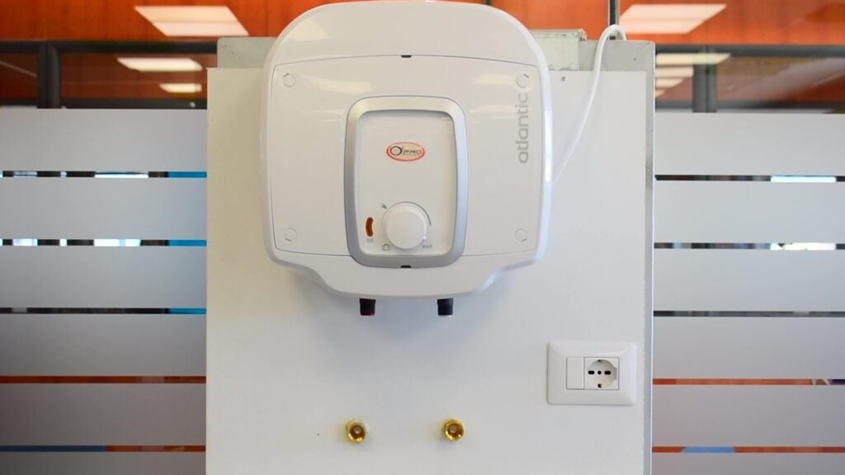
Once the operations described in the preceding paragraphs have been completed, we can switch the water heater on. The LED on the casing will light up to indicate that the device is working properly
The handle, on the other hand, will allow us to set the desired degrees of hot water. The advice is to never set it to maximum.
You can also find the tutorial video on our YouTube channel Elettronew to show you practically how to proceed and guide you through each step.
You might also be interested in:
- Differences between a boiler and a water heater: consumption comparisons
- Low hot water pressure: possible causes
- Towel radiators hydronic and electric: how to choose