In this post we will see how to wire a light switch to a socket, following a few simple steps.

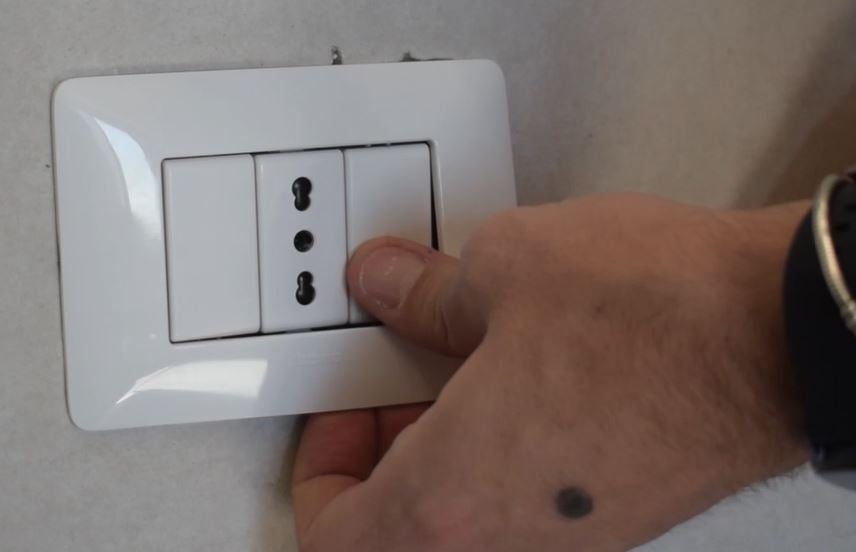
Light switch wired to an outlet
Often the need may arise to have, next to an electrical socket, a switch through which to control, for example, the switching on and off of a lamp. Making such a modification is a simple operation, you just need follow a few steps carefully.
In this post we will find out how to proceed in order to wire a light switch next to a socket, taking advantage of the electric current that reaches it. We also remind you that in our covers and switches section you will find all the parts we mention in the guide that you will need to carry out the installation correctly, just make sure you have everything you need.
Index:
We start by advising you to have a look at our blog post: “Sockets: the characteristics“
This will enable you to approach this guide with a full understanding of the differences between the various sockets and how they work. If, on the other hand, you are already familiar with the subject, we can get to the action!
Before proceeding with the installation, we advise you to switch off the energy meter, in order to carry out all operations safely, in the absence of current
Starting situation
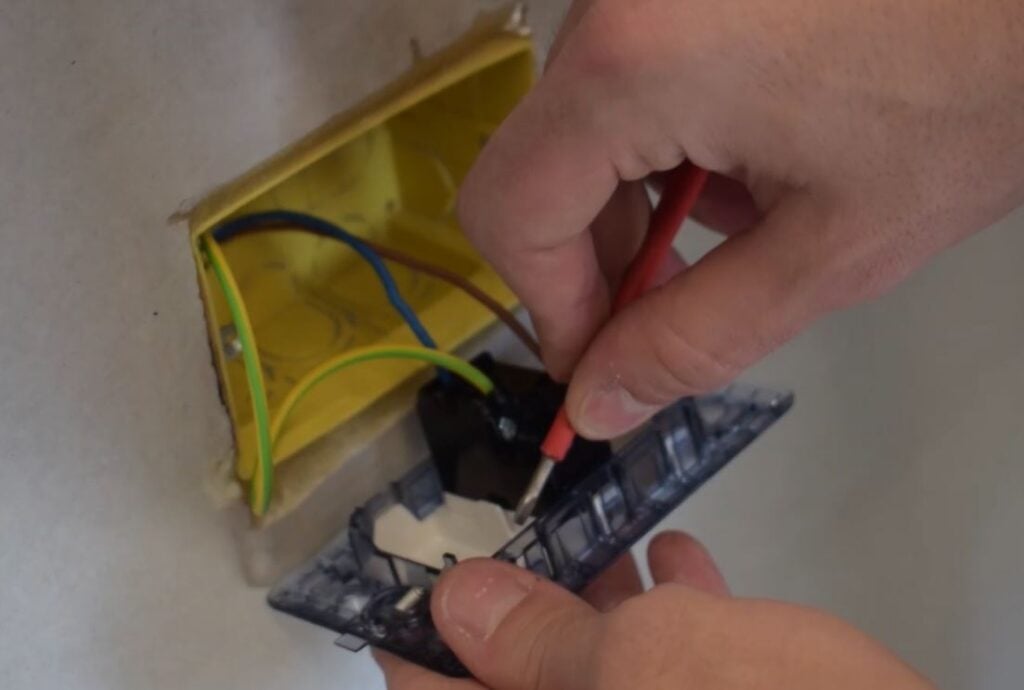
We therefore have a socket in the centre, with two blank modules on the sides. The first step is to dismantle the plate and pull the frame out of the wall box, unscrewing the two side screws, as you can see from the photos:

Behind the socket, we find three unipolar cables wired to it:
- Brown: phase
- Blue: neutral
- Green-yellow: ground

We often see different coloured cables in electrical installations. Each of them has a precise meaning.
Wiring the light switch to the outlet
Now we remove the blank module and insert, in its place, a classic switch which we will then wired to the socket.


We begin by bringing the phase from the socket to the switch, and we do this through the use of a wire which will act as a bridge between the two poles. One end will be wired to the free terminal of the phase of the socket, and the other end to the terminal (it does not matter which one of the two) of the phase of the switch.
Below is an image showing the final result:

How to wire the lamp holder?
In the photo below you can see the light point to be controlled by the switch. Behind the lamp holder there are two wires: phase (in this case the grey cable) and neutral, i.e. the blue cable.

We take the phase of the lamp holder and insert it into the free terminal of the switch, next to the phase coming from the socket:

The neutral coming out of the lamp holder, on the other hand, should be wired directly into the free terminal next to the neutral of the socket, without passing through the switch we have just mounted. The end result will be as follows:

We have completed the connections and can screw the frame back onto the box, also placing the plate on top of it.

The final test
Having completed all wired correctly, we can finally test the switch: the light switches on and off without any problems, proving that the operation was successful.


As you may have noticed, the installation of a switch next to an electrical socket, inside a walled-in frame, is an all in all simple operation, even for the less experienced.
You might also be interested in:
- How to install a double-pole switch
- Bticino Living Now catalogue: 2024 complete offer
- What is home automation? Meaning and definition in 2024