Plumbing systems, as we know, are not among the easiest things to manage, and for those who are not professionals, there is always a bit of fear of causing serious damage. Over time, water can cause wear, oxidation or minor damage to components, even if care is taken with maintenance. Sooner or later, it will be inevitable to replace some parts — hopefully as late as possible!
One of the elements that may need replacing is the drain pipe with bend. We have therefore decided to show you how to replace it easily and safely, even if you have never worked on plumbing before. All you need are a few tools, a little care and attention… and the will to DIY!
Index:
- What a drain pipe with bend is and what it is used for
- When to replace the drain pipe: signs to look for
- Tools required for replacement
- How to replace the drain pipe with bend: step-by-step guide
- Video guide to replacing the drain pipe with bend
- Small job, great satisfaction
What a drain pipe with bend is and what it is used for
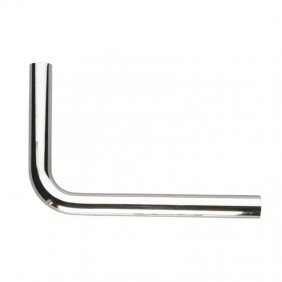
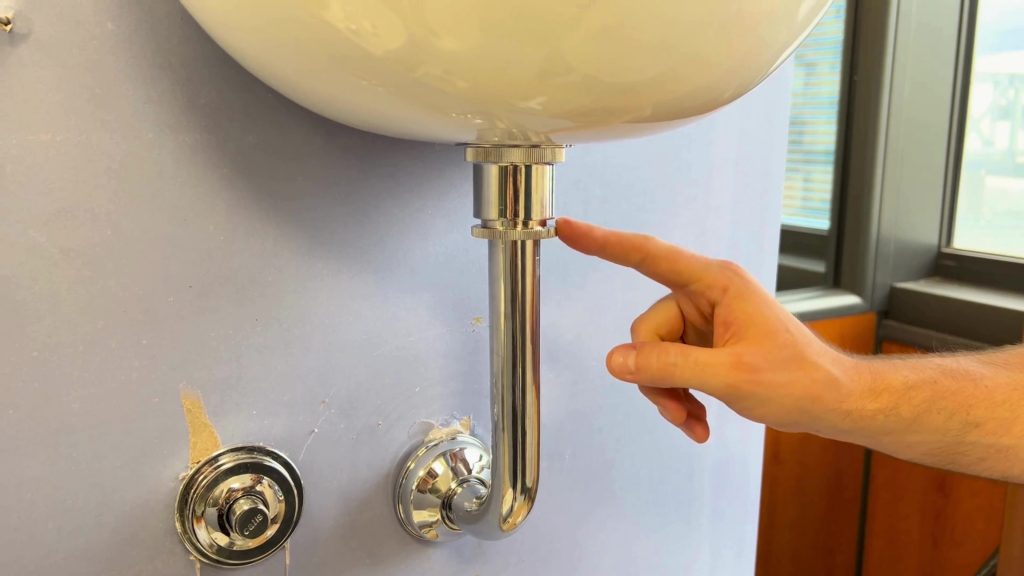
There are many elements that can be used to create a good plumbing system, and in some cases they have very similar names, so it is easy for those who are less experienced to get confused. First of all, let’s clarify what a drain pipe with bend is. It is a pipe with an angular connection, which is used to connect the toilet cistern to the bowl, passing through the wall. It is an essential part of the system, allowing water to pass through to clean the bowl.
When to replace the drain pipe: signs to look for
Understanding when it is time to replace the drain pipe is essential to avoid more serious damage to the bathroom plumbing system. Although at first glance it may seem like a simple pipe, the drain pipe plays a key role in connecting the cistern to the toilet. Here are the main signs that indicate a problem:
- Water leaks
If you notice water dripping from the surface of the pipe, it is clear that it may be damaged, cracked or no longer properly sealed. Even minor leaks must be repaired immediately to prevent damage or mould growth. - Visible oxidation or scaling
Over time, moisture can cause corrosion or limescale deposits on the pipe, especially if it is made of metal or if the bathroom is poorly ventilated. If you see damaged, discoloured or encrusted parts, consider replacing them before cracks or breaks form. - Drainage not working or noisy
If the water does not drain properly or you hear unusual noises (gurgling, water hammer), there may be a blockage or misalignment in the drain pipe. - Abnormal movement of the pipe
The drain pipe should be firmly secured. If you feel it moving or wobbling when you touch the cistern, it may have become loose or damaged at the joints.
Furthermore, a good opportunity to replace the drain pipe with bend is when changing the Catis unit, since these are elements that come into contact with each other, but above all because the ring nuts and gaskets to be inserted into the drain pipe with bend are part of the Catis unit kit. But let’s take it one step at a time.
Tools required for replacement
Before starting the replacement, it is advisable to ensure that you have everything you need to complete the job in the most professional manner possible.
In this case, you won’t need many items, but let’s take a closer look at what you will need:
- The new drain pipe with bend to replace the oxidised one or the one that is no longer in good condition
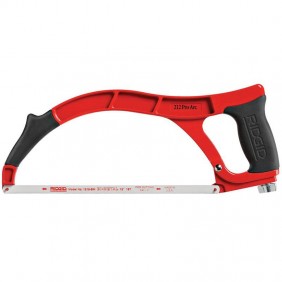
2. A hacksaw for resizing the drain pipe with bend if necessary
3. A spanner to help us with the ring nuts
Furthermore, as we anticipated, in the event of replacement of the Catis unit, we will also have the option of replacing the ring nuts and gaskets affixed to the drain pipe with bend.
In this case, it is clear that you will also need to purchase a new Catis unit
How to replace the drain pipe with bend: step-by-step guide
Now that we know exactly what we are going to replace and we have everything we need for a professional installation, we can move on to the actual work.
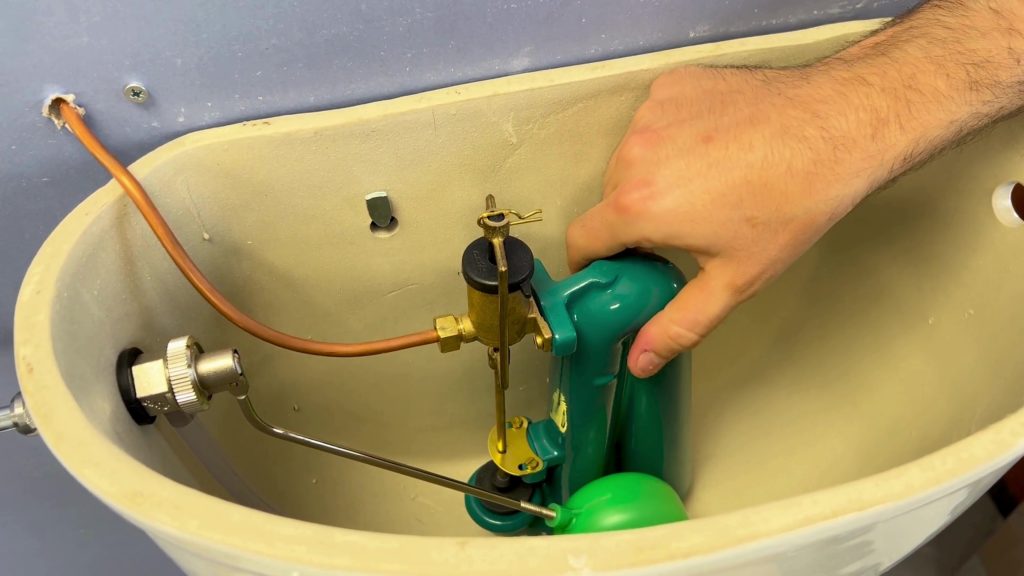
Firstly, it goes without saying that you need to turn off the water and empty the cistern by pressing the flush button. At this point, we can proceed to release the upper part of the float valve secured by the two ring nuts, using a spanner.
Once the two ring nuts have been unscrewed, the square sleeve can be removed. To do this, it will be necessary to slightly lift the Catis unit inside the flush cistern.
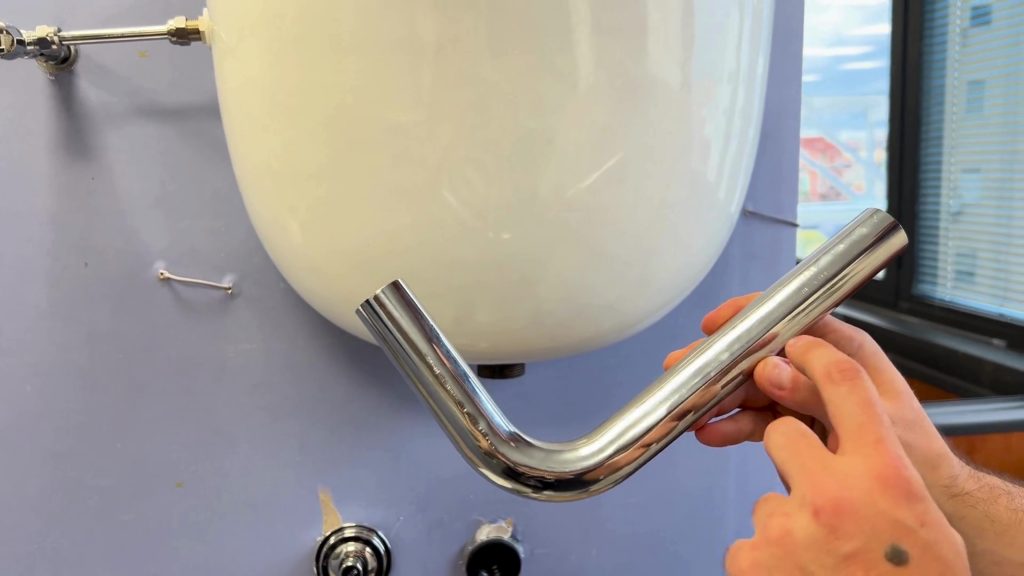
After this step, you can remove the drain pipe with bend, like this.
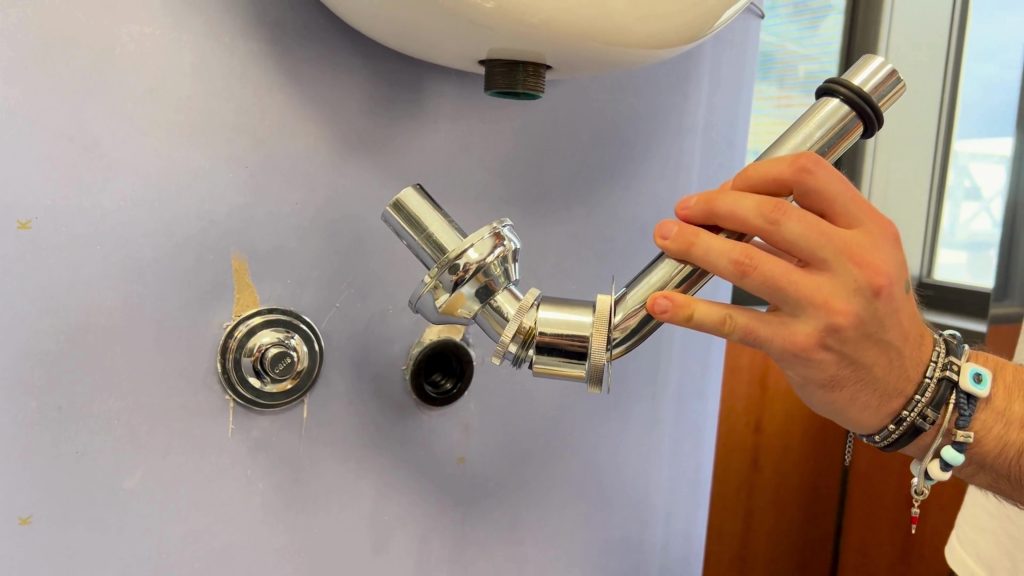
At this point, all we have to do is take the new drain pipe with bend and cut it to the same size as the previous one using a hacksaw, then insert the new ring nuts and gaskets, taking care to follow a specific order of insertion:
- Lower ring nut
- Square gasket
- Upper ring nut
- O-ring gasket
- Pipe cover
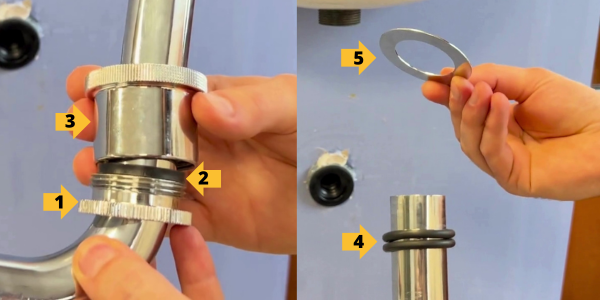
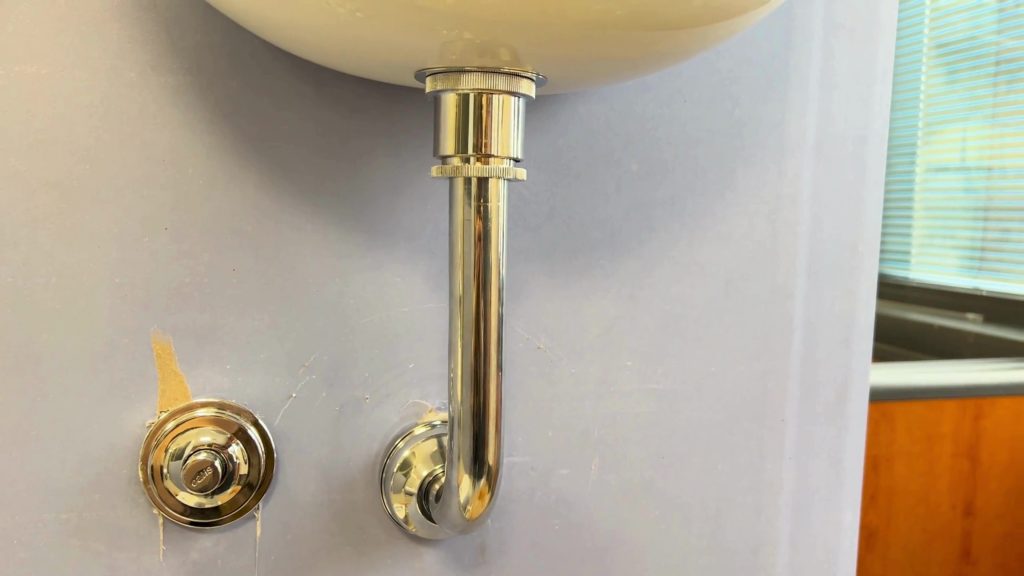
And on the other side of the drain pipe, we place the decorative pipe cover again.
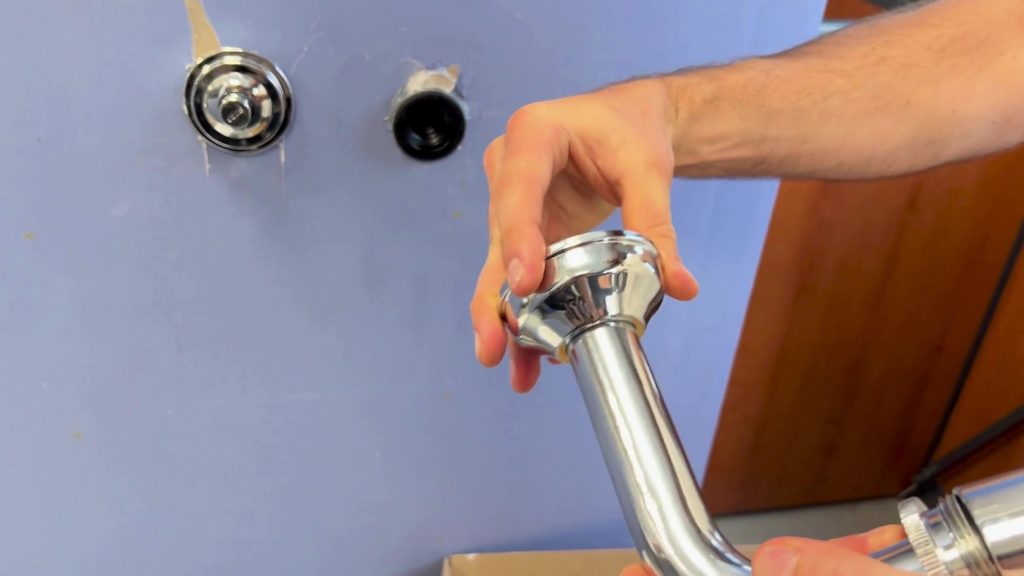
At this point, all that remains is to reinsert the drain pipe with bend into its initial position, remembering to insert the lower part first, which goes directly into the wall with the decorative pipe cover, and then lift the Catis to more easily insert the part that connects to the toilet cistern.
At this point, we can lift and tighten the ring nuts, starting with the top one and proceeding to the bottom one, always using the open-ended spanner to help us.
We have thus completed the replacement of a drain pipe with bend.
Video guide to replacing the drain pipe with bend
Would you like to see how to replace a drain pipe, step by step? On Elettronew’s YouTube channel, you will find a practical video that guides you through each step, so you can tackle the job with greater confidence and peace of mind.
Small job, great satisfaction
Replacing a drain pipe with bend can be daunting, especially if you have never worked on plumbing before. In reality, with a little care and the right tools, it is a job that even beginners can do.
By following the steps outlined in this guide, you will have a clearer idea of how to proceed with this replacement and, above all, it can be a way to learn more about your home and make it more efficient.
If you have successfully completed the job: congratulations! If, on the other hand, you have encountered difficulties, do not be discouraged. Every experience is a step forward. And remember: when the problem is more serious or you have doubts about the safety of the intervention, calling a professional is always the right choice.
You might also be interested in: